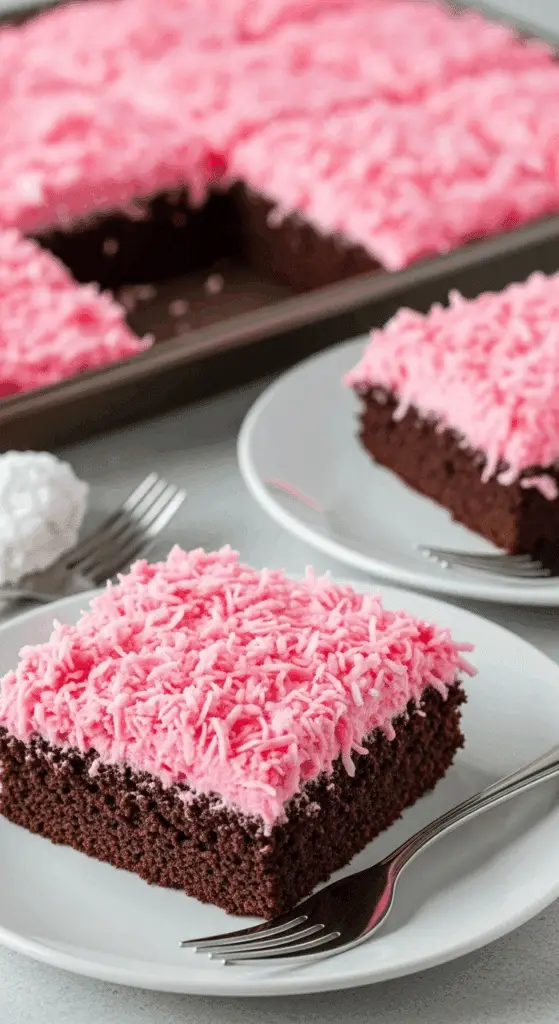
Okay, let me tell you about this Hostess snowball cake recipe that’s basically like time travel in dessert form. You know those pink coconut-covered treats from your childhood that you’d beg your mom to buy at the gas station? Well, this homemade version is like those little cakes grew up, went to culinary school, and came back way better than you remembered.
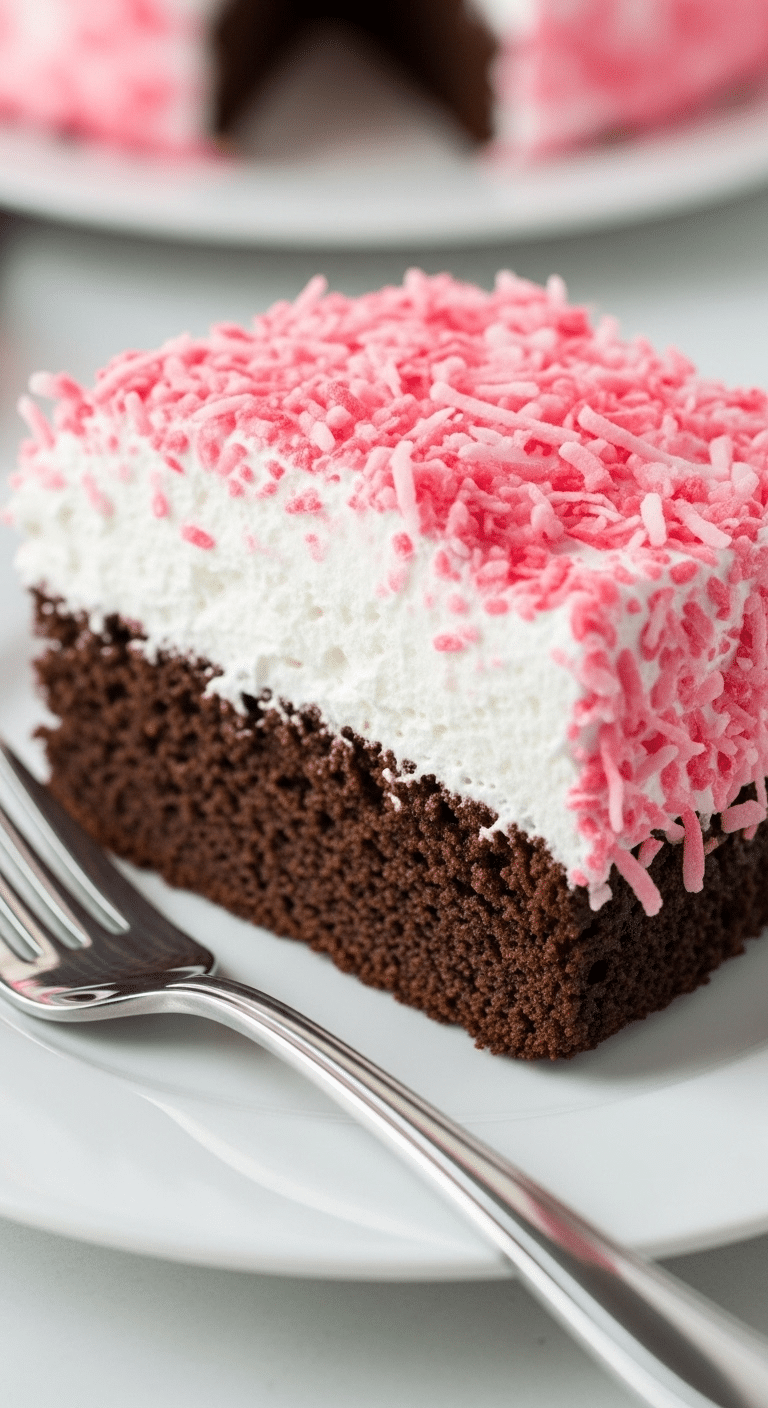
This Hostess snowball cake recipe takes everything you loved about the original – that rich chocolate cake, fluffy marshmallow topping, and iconic pink coconut coating – and makes it a thousand times better with real ingredients and homemade love. I’m talking about a cake that’ll have adults getting misty-eyed over childhood memories while kids discover what all the fuss is about.
I’ve been making this Hostess snowball cake recipe for family gatherings and parties, and it’s honestly become the dessert that disappears first. There’s something magical about that combination of nostalgia and incredible homemade flavor that just hits different, you know?
Why This Hostess Snowball Cake Recipe is Pure Genius
Here’s what makes this Hostess snowball cake recipe so amazing: it captures all the nostalgic magic of the original but with flavors that’ll blow your mind. The chocolate cake is moist and rich (thanks to a secret splash of coffee), the marshmallow frosting is fluffy and sweet, and that pink coconut coating? Pure childhood happiness in edible form.
The best part is seeing people’s faces when they realize this isn’t just some random cake – it’s a full-on recreation of their favorite childhood treat, but better. Way better. We’re talking homemade quality that makes the store-bought version seem like a distant, pale memory.
The breakdown: Takes about 53 minutes plus cooling time, serves 20 people (so it’s perfect for parties), intermediate level (but totally doable), and guaranteed to make you everyone’s favorite baker.
Table of Contents
Table of Contents
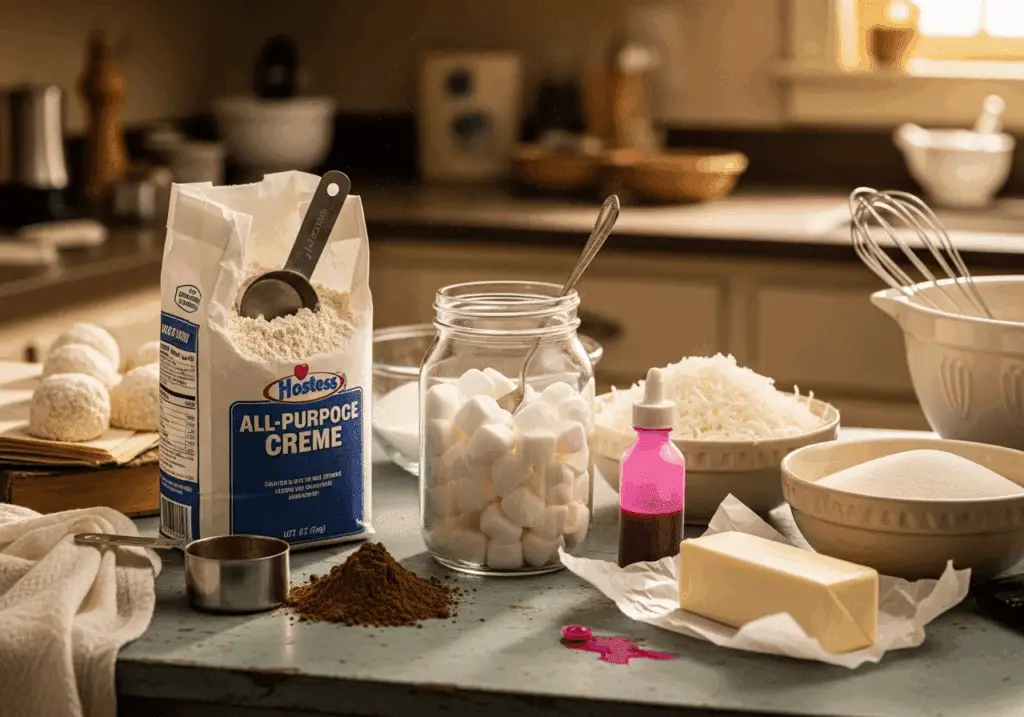
Everything You Need for This Amazing Hostess Snowball Cake Recipe
For the Rich Chocolate Base:
- 1½ cups all-purpose flour
- ½ cup unsweetened cocoa powder (don’t cheap out here)
- ½ teaspoon kosher salt
- 1 teaspoon baking soda
- ½ teaspoon baking powder
- ½ cup hot brewed coffee (trust me, this is the secret)
- ½ cup whole milk
- ½ cup unsalted butter, softened
- 1½ cups granulated sugar
- 2 large eggs
For the Fluffy Marshmallow Magic:
- 7-oz jar Marshmallow Fluff (the good stuff)
- ½ cup unsalted butter, softened
- 1 teaspoon pure vanilla extract
- 2 cups powdered sugar
For That Iconic Pink Coating:
- 3 cups shredded sweetened coconut
- 2-4 drops pink food coloring (start with less – you can always add more)

Want to switch things up? You can use strong tea instead of coffee, try different colored coconut for holidays, or even make mini cupcake versions if you’re feeling fancy.
Let’s Make This Life-Changing Hostess Snowball Cake Recipe!
Step 1: Get Your Oven Ready Preheat to 350°F and spray a 13×9 baking dish with cooking spray. I also like to line it with parchment paper because nobody wants their beautiful cake sticking to the pan.
Step 2: Mix the Dry Squad In a medium bowl, whisk together flour, cocoa powder, salt, baking soda, and baking powder. Make sure you sift that cocoa powder or you’ll get lumps – learned that one the hard way!
Step 3: The Coffee Magic Mix your hot coffee with the milk and let it cool slightly. This coffee trick is what makes this Hostess snowball cake recipe taste so incredibly rich and chocolatey.
Step 4: Cream Like a Pro Beat butter and sugar with an electric mixer for a full 5 minutes until it’s light and fluffy. This is where the magic happens – don’t rush this step!
Step 5: Add the Eggs Add eggs one at a time, beating well after each. Room temperature eggs work best, so take them out of the fridge ahead of time if you remember.
Step 6: Bring It All Together Alternate adding the dry ingredients and coffee mixture, starting and ending with the dry stuff. Mix just until combined – overmixing makes tough cake, and we want this Hostess snowball cake recipe to be tender and perfect.
Step 7: Bake to Perfection Pour into your prepared pan and bake for 33-38 minutes until a toothpick comes out clean. Don’t overbake – moist cake is the goal here!
Step 8: The Waiting Game Let it cool completely before frosting. I know it’s torture, but hot cake will melt your beautiful marshmallow frosting, and that’s just sad.
Step 9: Marshmallow Frosting Magic Beat Marshmallow Fluff with softened butter for 3-4 minutes until light and combined. Then add vanilla and powdered sugar, beating until smooth and creamy.
Step 10: Make That Pink Coconut In a separate bowl, mix coconut with pink food coloring until it’s evenly colored. Start with just a couple drops – you can always add more, but you can’t take it back!
Step 11: The Grand Assembly Spread the marshmallow frosting over your cooled cake, then immediately sprinkle that gorgeous pink coconut all over. Press it gently so it sticks.

Making Your Hostess Snowball Cake Recipe Look Amazing
The beauty of this Hostess snowball cake recipe is that it already looks incredible with that iconic pink coconut coating. It’s instantly recognizable and makes people smile before they even take a bite. I love cutting it into generous squares and serving on colorful plates that play up the fun, nostalgic vibe.
The best part is watching people’s reactions when they see it – there’s always this moment of recognition followed by pure excitement. It’s like you’ve brought a piece of their childhood back to life.
PrintHostess Snowball Cake Recipe: The Ultimate Nostalgia Trip That’ll Take You Back to Childhood
This Hostess Snowball Cake is a fun and delicious dessert inspired by the classic snack cake, featuring a rich chocolate base topped with fluffy marshmallow frosting and a layer of sweet pink coconut for a nostalgic treat.
- Prep Time: 20 minutes
- Cook Time: 33 minutes
- Total Time: 53 minutes
- Yield: 20 slices
- Category: Dessert
- Method: Baking
- Cuisine: American
- Diet: Vegetarian
Ingredients
- 1 ½ cups all-purpose flour
- ½ cup unsweetened cocoa powder
- ½ teaspoon kosher salt
- 1 teaspoon baking soda
- ½ teaspoon baking powder
- ½ cup brewed hot coffee
- ½ cup whole milk
- ½ cup unsalted butter, softened to room temperature
- 1 ½ cups granulated sugar
- 2 large eggs
- 7 ounces Marshmallow Fluff
- ½ cup unsalted butter, softened to room temperature
- 1 teaspoon pure vanilla extract
- 2 cups powdered sugar
- 3 cups shredded sweetened coconut
- 2-4 drops pink food coloring
Instructions
- Preheat the oven to 350°F (175°C). Spray a 13×9-inch baking dish with baking spray or use homemade cake release. Set aside.
- In a bowl, combine flour, cocoa powder, salt, baking soda, and baking powder. Set aside.
- In a measuring cup, mix hot coffee with the milk. Set aside.
- In the bowl of an electric mixer fitted with a whisk attachment, beat butter and sugar for 5 minutes, scraping down the sides as needed.
- Add eggs one at a time, mixing after each addition.
- Gradually add the dry ingredients, alternating with the coffee mixture, in about three additions each.
- Pour batter into the prepared pan and bake for 33–38 minutes, or until a toothpick inserted in the center comes out clean.
- Remove from the oven and allow the cake to cool completely before frosting.
- For the frosting, beat Marshmallow Fluff and softened butter for 3–4 minutes until combined. Add vanilla and powdered sugar, and beat for another 3–4 minutes until smooth.
- In a bowl, mix shredded coconut with 2–4 drops of pink food coloring until evenly colored. Add more coloring if desired.
- Spread frosting over the cooled cake with an offset spatula, then sprinkle the pink coconut evenly over the top.
- Slice and serve.
Notes
- Ensure the cake is completely cool before frosting to prevent melting.
- Adjust the amount of pink food coloring to achieve your preferred shade.
- Store leftovers covered at room temperature for up to 2 days or refrigerated for up to 5 days.
- For a richer flavor, use espresso instead of regular coffee.
Storage and Make-Ahead Magic
Here’s the deal: This Hostess snowball cake recipe keeps great covered at room temperature for up to 3 days, or in the fridge for a week. The cake base can even be made ahead and frozen for up to 3 months – just thaw and frost when you’re ready.
Pro tip: If you’re making this for a party, the marshmallow frosting holds up really well, but it might soften a bit in super hot or humid weather. Just something to keep in mind!
Gift idea: Cut into squares and wrap individually for the cutest nostalgic gifts ever. People will lose their minds over getting homemade snowball cakes.
Fun Ways to Switch Up Your Hostess Snowball Cake Recipe
Rainbow Version: Use different colored coconut to make rainbow layers – kids go absolutely crazy for this!
Chocolate Coconut: Add some cocoa powder to the coconut for a chocolate version that’s equally stunning.
Holiday Themes: Green coconut for Christmas, orange for Halloween – this Hostess snowball cake recipe is so versatile for different celebrations.
Mini Cupcakes: Make individual snowball cupcakes for parties and portion control (though good luck stopping at just one).
Why This Hostess Snowball Cake Recipe is Such a Winner
After making this Hostess snowball cake recipe countless times, I can honestly say it never gets old watching people’s faces light up when they see it. There’s something so special about recreating those childhood flavors but making them even better with homemade quality.
The rich chocolate cake, fluffy marshmallow frosting, and sweet coconut coating create this perfect combination that hits all the nostalgia buttons while actually tasting incredible. It’s comfort food that brings people together over shared memories.
I love that this Hostess snowball cake recipe works for both kids who are discovering these flavors for the first time and adults who remember them fondly. It’s like the perfect bridge between generations.
More Nostalgic Treats You’ll Love
If this Hostess snowball cake recipe has you feeling all nostalgic for childhood treats made better, you’re gonna absolutely love our Circus Animal Cookie Cake – it’s like taking those iconic pink and white cookies and turning them into the most whimsical cake ever. Pure childhood magic in cake form!
For something elegant but still nostalgic, our Almond Raspberry Swirl Cake and White Chocolate Raspberry Dream Cake are both stunning options that feel fancy but still have that comforting, familiar appeal.
And if you want to balance out all this cake indulgence with something healthy (but still delicious), our Chocolate Protein Overnight Oats with Banana are like having chocolate cake for breakfast but it’s actually good for you – perfect for the morning after a Hostess snowball cake celebration!
Want to see all my latest nostalgic recipe recreations and baking adventures? Follow me on Pinterest where I share all the behind-the-scenes recipe testing and tips that help bring childhood favorites into your kitchen!
The Bottom Line on This Hostess Snowball Cake Recipe
This Hostess snowball cake recipe has honestly become one of my most requested desserts because it delivers on so many levels. It’s nostalgic, delicious, impressive-looking, and brings so much joy to every gathering where it appears.
Whether you’re trying to recreate childhood memories, impress guests with something unexpected, or just want a cake that’s guaranteed to make people smile, this Hostess snowball cake recipe delivers every single time.
The best part? It’s way easier than it looks, and the results are so much better than anything you can buy in a store. Plus, you get to be the hero who brought everyone’s favorite childhood treat back to life.
So go ahead, give this Hostess snowball cake recipe a try and prepare to become the person everyone asks “Are you making that amazing pink cake again?” Trust me, once people taste this homemade version, they’ll never look at the store-bought ones the same way again!
Frequently Asked Questions
How do you get the coconut to stick to the snowball cake?
The key is applying the coconut immediately after spreading the marshmallow frosting while it’s still soft and tacky. Press the coconut gently into the frosting to ensure good adhesion. The marshmallow frosting acts as a natural glue when fresh, but once it sets, coconut won’t stick as well. Work quickly but thoroughly for even coverage and good adhesion.
Can you make Hostess snowball cake ahead of time?
Yes, the cake base can be baked up to 2 days ahead and stored covered at room temperature, or frozen for up to 3 months. However, it’s best to apply the marshmallow frosting and coconut on the day of serving for optimal texture and appearance. The frosted cake can be stored covered at room temperature for up to 3 days.
What’s the best way to color the coconut evenly?
Use a wooden spoon or clean hands to mix the coconut with food coloring in a large bowl. Add coloring gradually – start with 2 drops and add more as needed. Mix thoroughly, breaking up any clumps, until the color is evenly distributed. Gel food coloring works better than liquid as it provides more vibrant color without adding excess moisture.
Why does my marshmallow frosting turn out too soft or too stiff?
Frosting consistency depends on proper butter temperature and mixing time. Butter should be softened but not melted – it should give slightly when pressed but hold its shape. Beat the marshmallow fluff and butter for the full 3-4 minutes to achieve proper lightness, then beat again after adding powdered sugar. If too soft, chill briefly; if too stiff, add a tablespoon of milk.

