Let me tell you about the Pumpkin Pie recipe that turned me into the designated dessert person for every single family gathering: this traditional recipe that delivers that perfect silky smooth filling and flaky homemade crust that makes people forget about store-bought forever.
I discovered this recipe a few years ago when I was tired of bringing sad grocery store pies to Thanksgiving and watching everyone politely eat one bite before abandoning them. This Pumpkin Pie changed everything – we’re talking about authentic fall flavors that capture the essence of autumn in every single bite, with a texture so smooth it’s like eating pumpkin-flavored silk.
The secret? Using brown sugar instead of white creates these deeper molasses flavors that complement pumpkin perfectly, and the evaporated milk ensures that incredibly smooth texture everyone raves about. Plus, the decorative pastry elements make it look like it came from a fancy bakery instead of your regular kitchen.
Why This Pumpkin Pie Is the Ultimate Fall Dessert
Here’s what makes this Pumpkin Pie absolutely extraordinary – it uses traditional techniques that have been passed down through generations, creating layers of complexity from those perfectly balanced warm spices. The combination of cinnamon, cloves, nutmeg, and ginger creates this incredible flavor profile that tastes like fall decided to become a dessert.
The Impressive Stats:
- Total time: 4 hours 10 minutes (but most of that is chilling time!)
- Active time: 20 minutes of actual work
- Difficulty: Intermediate (but totally manageable with patience)
- Yield: 2 complete 9-inch pies (16 generous slices total)
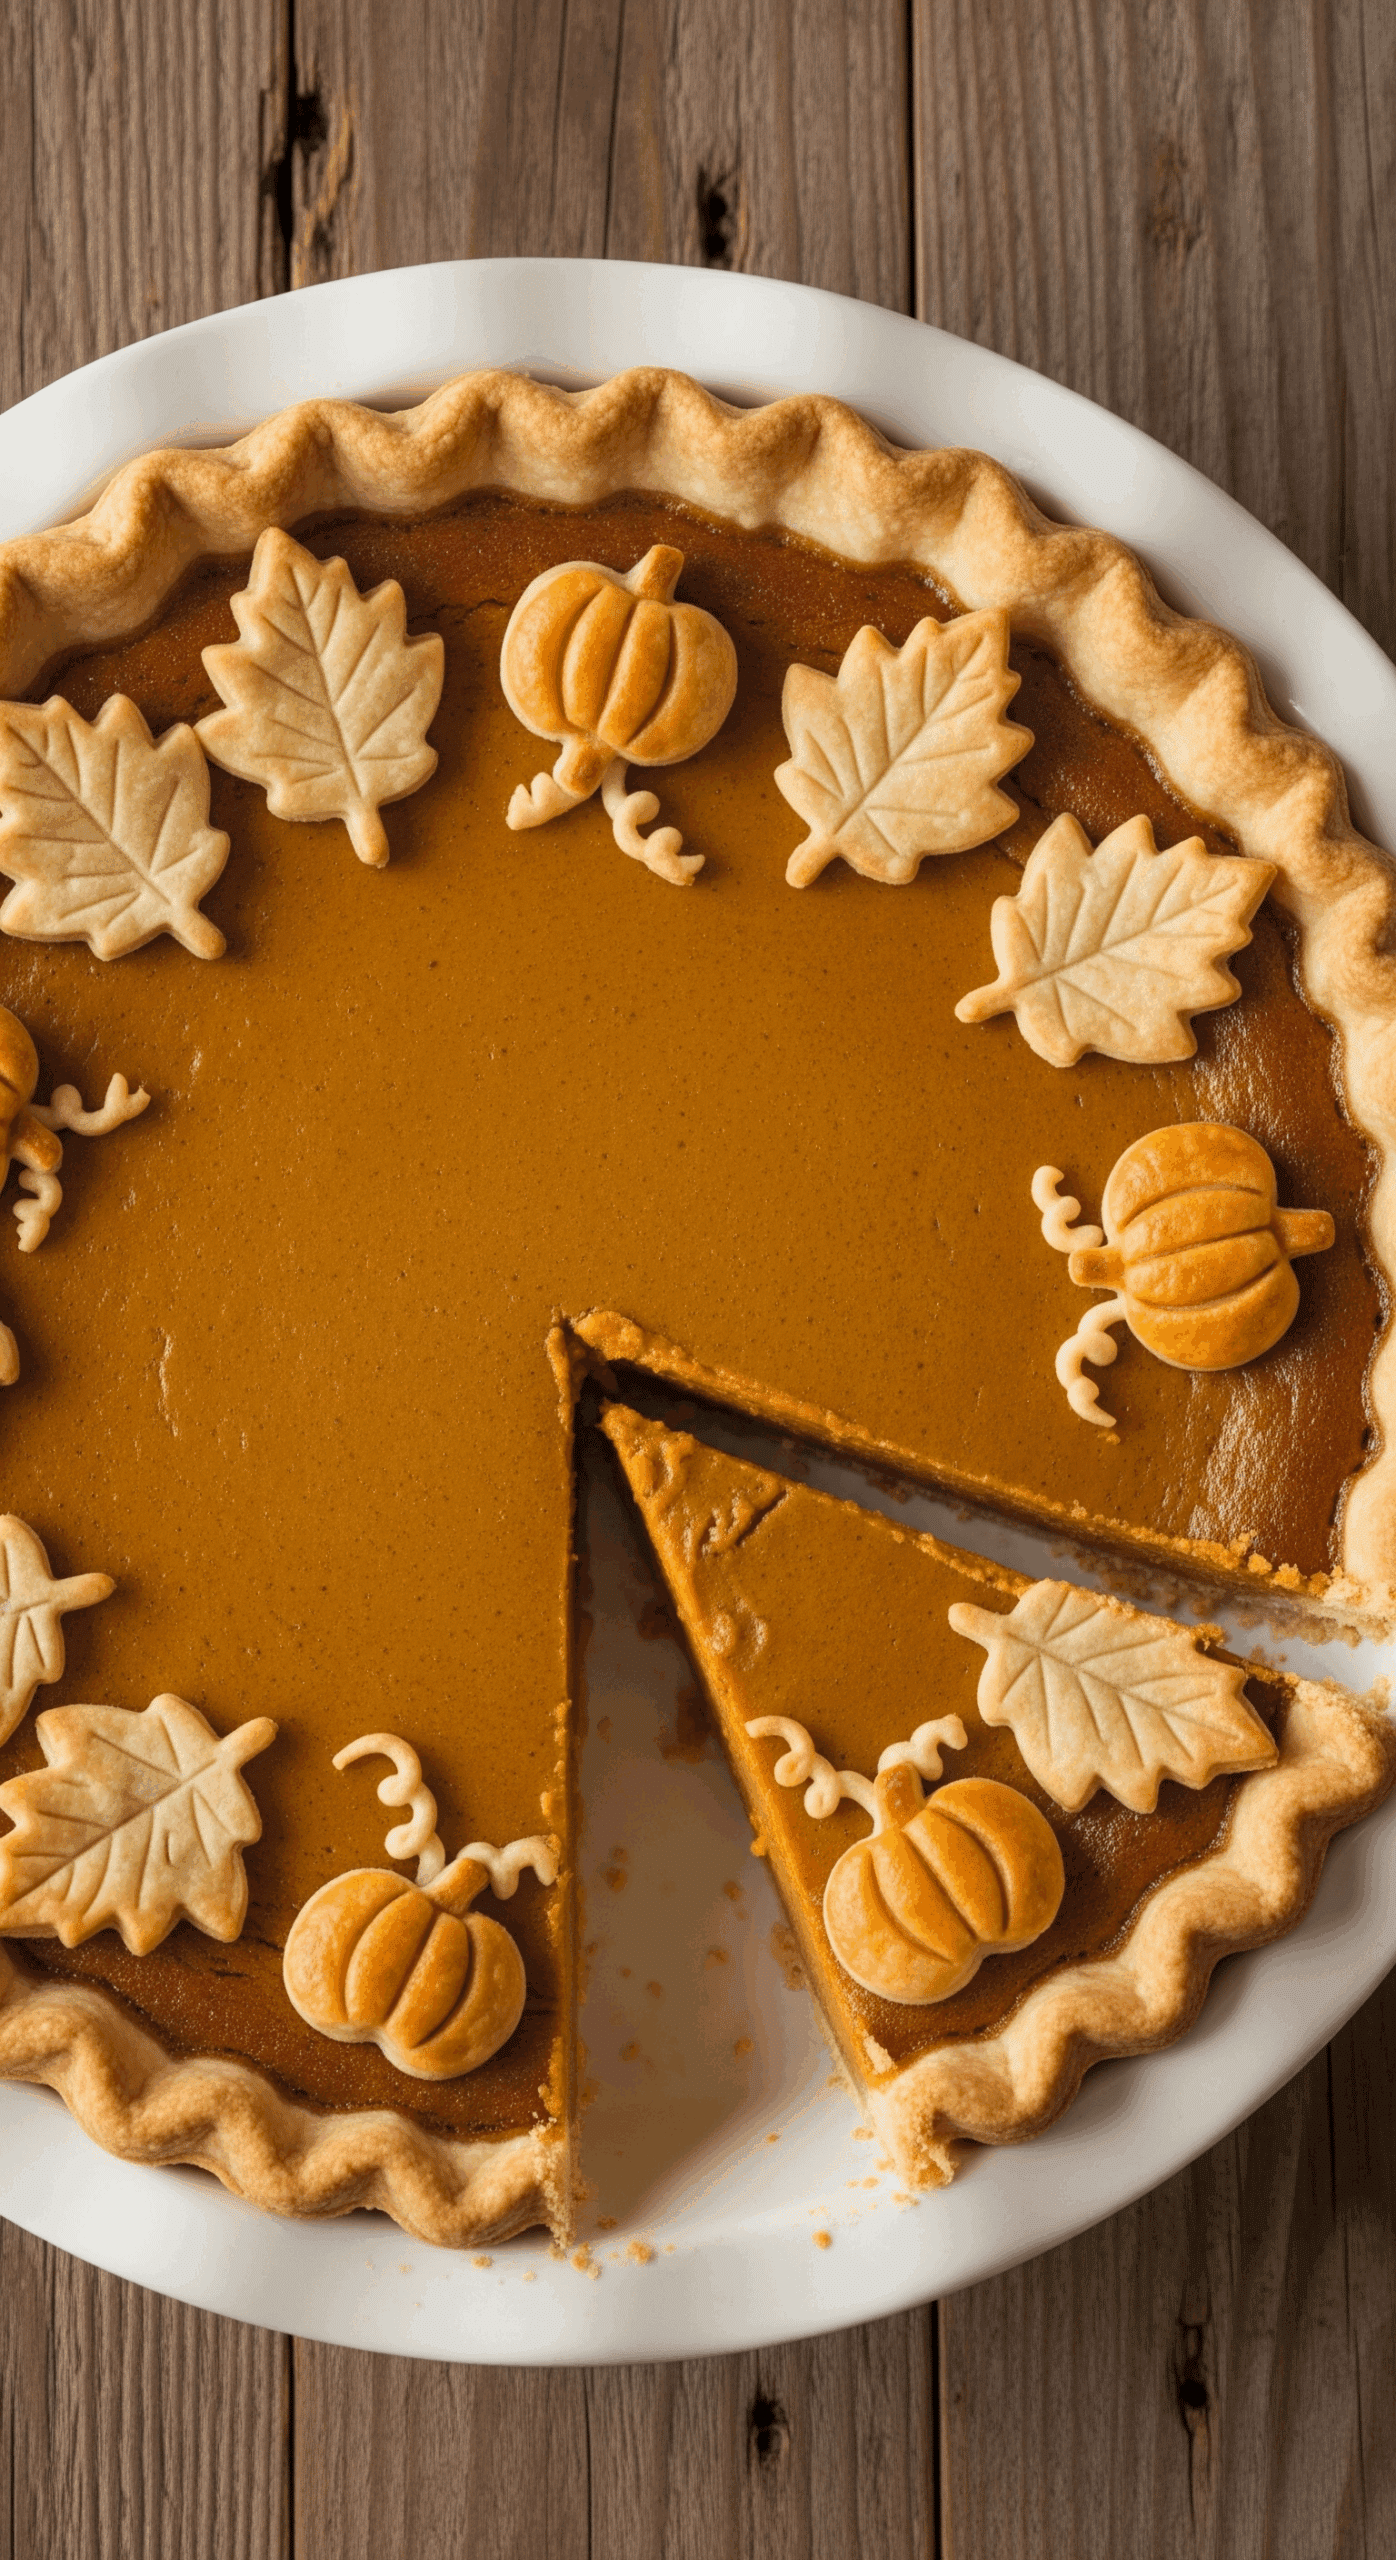
What I absolutely love about this Pumpkin Pie is how it creates two complete pies with golden-brown crusts and perfectly set filling. The decorative pastry elements add that professional bakery appeal that makes these pies the centerpiece everyone’s talking about.
Table of Contents
Table of Contents
Everything You Need for This Perfect Pumpkin Pie
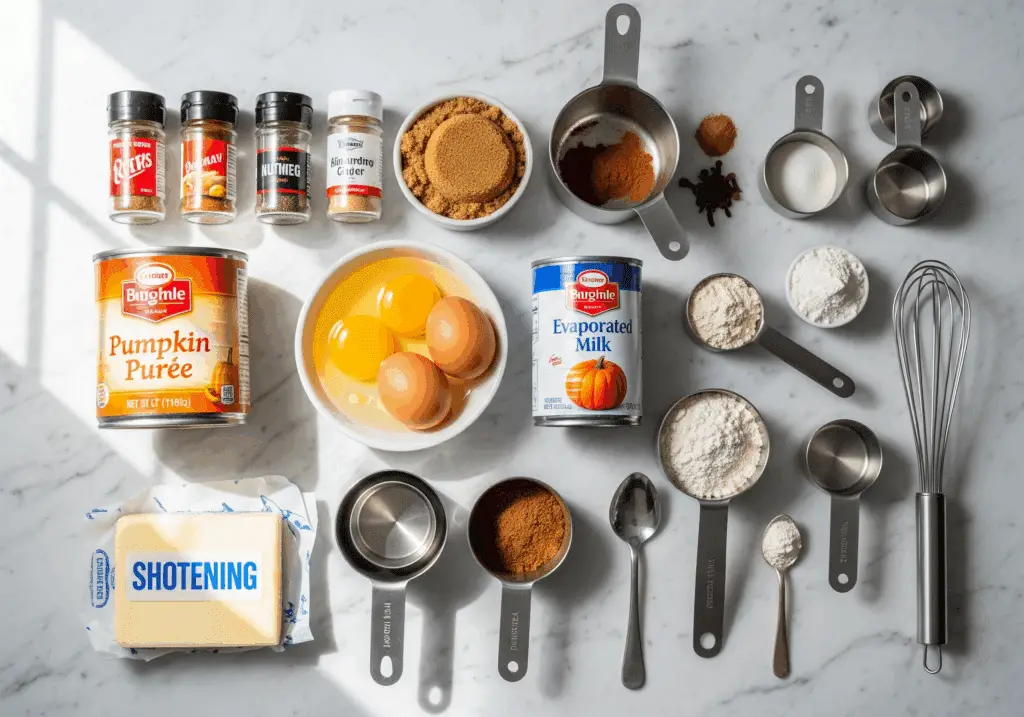
Let me break down what goes into these beauties. The ingredient list might look long, but it’s mostly spices and pantry staples:
For the Homemade Crust:
- 2 cups all-purpose flour
- 3/4 teaspoon salt
- 2/3 cup shortening
- 4 to 6 tablespoons cold water
For the Pumpkin Filling (the star of the show):
- 6 large eggs
- 1 can (29 ounces) pumpkin (pure pumpkin, not pie filling!)
- 2 cups packed brown sugar (this is the secret!)
- 2 teaspoons ground cinnamon
- 1 teaspoon salt
- 1/2 teaspoon each: ground cloves, nutmeg, ginger
- 2 cups evaporated milk
For Optional Decorations:
- Extra pie dough for decorative elements
- 1 large egg, beaten for egg wash
- Whole cloves for natural pumpkin stems

Real Talk About Your Ingredients:
Brown sugar situation: This is what sets this Pumpkin Pie apart from all the others. The molasses flavors create this incredible depth that white sugar just can’t match. Pack it firmly when measuring.
Pure pumpkin only: Don’t even think about using pumpkin pie filling – it’s already spiced and will throw off the whole balance. Stick with pure pumpkin puree.
Evaporated milk magic: This is what creates that silky smooth texture. Don’t substitute regular milk – evaporated milk is concentrated and creates the perfect custard consistency.
How to Make This Incredible Pumpkin Pie
Alright, let’s dive into the actual magic-making. Don’t let the homemade crust intimidate you – it’s easier than it looks.
Step 1: Get Your Crust Game On
Preheat your oven to 450°F while you make the crusts. In a large bowl, combine flour and salt, then cut in the shortening until the mixture looks like coarse crumbs with some pea-sized pieces. This texture is what creates flaky crust.
Step 2: Form That Dough
Gradually add cold water, tossing with a fork until the dough forms a cohesive ball. Don’t overwork it – that’s what makes tough pastry. Divide the dough in half for your two crusts.
Step 3: Roll Like a Pro
Roll each portion on a floured surface to 12-inch circles, about 1/8-inch thick. Place them in 9-inch pie plates, trim the edges to 1/2-inch beyond the rim, then flute decoratively. This is where you can get creative with your edge design.
Step 4: Create the Perfect Filling
Beat those eggs thoroughly in a large bowl until smooth. Add the pumpkin, brown sugar, cinnamon, salt, cloves, nutmeg, and ginger, beating just until combined. Don’t overmix – that incorporates too much air and can cause cracks.
Gradually stir in the evaporated milk until everything’s smooth and gorgeous.
Step 5: Fill and Start Baking
Divide the filling evenly between your prepared crusts, pouring carefully to avoid spills. Bake at 450°F for exactly 10 minutes – this sets those crust edges perfectly.
Step 6: Lower and Continue
Reduce the oven temperature to 350°F and continue baking for 40-45 minutes until a knife inserted near the center comes out clean. The centers should be just set but not cracked – a slight jiggle in the very center is actually perfect.
Step 7: The Patience Part
Cool the pies on wire racks for 1 hour at room temperature, then refrigerate for minimum 3 hours before serving. This chilling time is crucial – it allows the filling to set completely so you get clean slices.
Step 8: Add Those Decorative Touches
If you’re doing decorative elements, create them using extra dough, brush with beaten egg, and bake separately at 400°F until golden. Arrange them on the chilled pies just before serving to maintain crispness.

Making Your Pumpkin Pie Look Bakery-Perfect
When it’s time to slice these beauties, use a sharp knife dipped in warm water and wiped clean between cuts. This prevents the filling from sticking and gives you those clean, professional-looking slices.
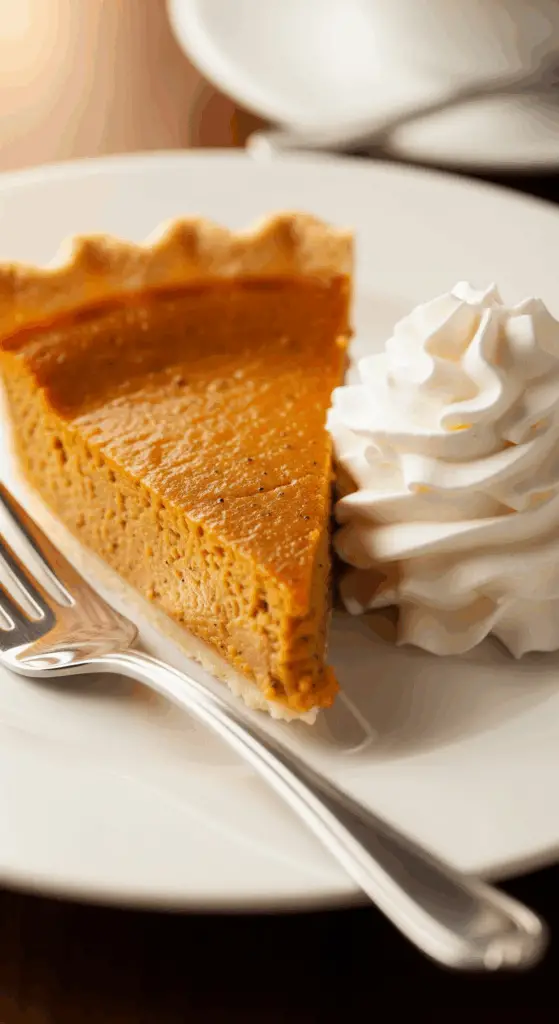
For elegant presentation, serve slices on chilled dessert plates with a dollop of fresh whipped cream or vanilla ice cream. Dust the plates lightly with cinnamon for that restaurant-style presentation, and maybe add a caramel drizzle if you’re feeling fancy.
Storage and Make-Ahead Magic
Cover your pies loosely with plastic wrap and refrigerate for up to 3 days. The custard filling actually maintains quality better when properly chilled and covered.
Make-ahead strategy: You can prepare the crusts and decorations one day ahead, then bake the pies completely and chill overnight. This actually improves the flavor development and makes slicing way easier.
Freezing trick: Freeze baked pies wrapped tightly in plastic and foil for up to 2 months. Thaw completely in the refrigerator overnight before serving. Add decorative elements fresh for the best appearance.
Serving options: These taste amazing chilled or at room temperature. If you want to warm day-old pie, just pop it in a 300°F oven for 10 minutes.
PrintPumpkin Pie That’ll Make Your Thanksgiving Table the Star of the Show
Classic creamy pumpkin pie in a flaky homemade crust. This recipe makes two 9-inch pies with a warmly spiced filling and optional baked pie-dough decorations.
Ingredients
- Crust:
- 2 cups all-purpose flour
- 3/4 teaspoon salt
- 2/3 cup shortening
- 4 to 6 tablespoons cold water
- Filling:
- 6 large eggs
- 1 can (29 ounces) pumpkin
- 2 cups packed brown sugar
- 2 teaspoons ground cinnamon
- 1 teaspoon salt
- 1/2 teaspoon ground cloves
- 1/2 teaspoon ground nutmeg
- 1/2 teaspoon ground ginger
- 2 cups evaporated milk
- Decorations (optional):
- Dough for single-crust pie
- 1 large egg, beaten
- Whole cloves (for pumpkin stems; optional)
Instructions
- Preheat oven to 450°F (232°C).
- Make the crust: In a large bowl, combine flour and salt. Cut in shortening until the mixture is crumbly. Sprinkle in cold water, 1 tablespoon at a time, tossing with a fork until a dough forms.
- Divide dough in half. On a floured surface, roll each half to fit a 9-inch pie plate. Transfer to plates and trim to 1/2 inch beyond rim; flute edges.
- Make the filling: In a large bowl, beat the eggs. Add pumpkin, brown sugar, cinnamon, salt, cloves, nutmeg, and ginger; beat just to combine. Gradually stir in evaporated milk.
- Pour the filling evenly into both unbaked pie crusts.
- Bake at 450°F (232°C) for 10 minutes. Reduce oven temperature to 350°F (177°C) and continue baking until a knife inserted in the center comes out clean, 40–45 minutes.
- Cool pies on wire racks for 1 hour. Refrigerate for at least 3 hours before serving. Refrigerate leftovers.
- Optional decorations—Pumpkins: Roll a small piece of pie dough into a ball. Score ridges with the blunt side of a knife, flatten slightly, and insert a whole clove as the stem. Chill on a parchment-lined sheet, brush with beaten egg, and bake at 400°F (204°C) for 15–20 minutes until light golden.
- Optional decorations—Vines: Roll dough to 1/8-inch thickness and cut narrow strips. Shape into coils on a parchment-lined sheet, chill, brush with egg, and bake at 400°F (204°C) for 8–10 minutes.
- Optional decorations—Leaves: Roll dough to 1/8-inch thickness. Cut leaf shapes with mini cutters, score veins with a knife, chill, brush with egg, and bake at 400°F (204°C) for 8–10 minutes.
- Arrange the baked pumpkins, vines, and leaves on the chilled pies before serving.
Notes
- The total chilling time (1 hour cooling + at least 3 hours refrigeration) ensures clean slices and a properly set custard.
- Do not overbeat the filling; mixing just until combined helps prevent cracks.
- If the crust edges brown too quickly, shield with foil during the 350°F bake.
- Decoration pieces can be baked a day ahead and stored airtight at room temperature.
- Serve plain or with lightly sweetened whipped cream.
Fun Variations to Keep Things Interesting
Once you’ve mastered the classic Pumpkin Pie, it’s time to get creative:
Bourbon Pumpkin Pie: Add 2 tablespoons bourbon to the filling mixture. The alcohol cooks off during baking, leaving this sophisticated depth of flavor that’s absolutely incredible.
Maple Pecan Version: Replace half the brown sugar with pure maple syrup and top with candied pecans before baking. The complex sweetness and textural contrast are amazing.
Chocolate Swirl Magic: Marble 1/4 cup melted dark chocolate into the filling before baking. You get these beautiful patterns and rich flavor combination that’s totally unexpected.
Mini Pumpkin Pies: Divide the filling among individual tart shells for adorable personal-sized pies. Just reduce the baking time to 25-30 minutes.
The Health Perks (Because We Care About That Stuff)
Each slice of this Pumpkin Pie has about 321 calories and provides some surprising nutritional benefits. The pumpkin delivers beta-carotene that converts to vitamin A for eye health and immune function, while those spices offer antioxidants and anti-inflammatory compounds.
The eggs and milk contribute protein for satiety and calcium for bone health. The moderate protein content helps with satisfaction, and the fiber aids digestive health. Not bad for such an indulgent dessert!
Perfect Pumpkin Treats to Pair with Your Pumpkin Pie
Now that you’ve mastered this incredible Pumpkin Pie, let’s talk about creating the ultimate fall dessert spread! This classic pie works beautifully as part of a bigger pumpkin-themed collection.
If you want to keep the pumpkin theme going but switch up the format, my pumpkin s’mores cookies are absolutely perfect alongside this pie. They’ve got that same cozy pumpkin spice flavor but with the fun twist of s’mores elements – it’s like having campfire nostalgia meet autumn comfort food.
For those times when you want to offer different pumpkin options, try adding some maple pumpkin cookies to the dessert table. The maple flavors create this beautiful harmony with the traditional Pumpkin Pie spices, and having both cookies and pie gives people different textures and sweetness levels to choose from.
And here’s where I get really excited about fall baking spreads – add some pumpkin cream cheese bread to create this incredible pumpkin bakery experience! The cream cheese swirl bread provides a different format that’s perfect for morning coffee or afternoon snacking, while this Pumpkin Pie anchors the dessert course.
Having multiple pumpkin treats creates this amazing seasonal spread where every bite celebrates autumn flavors in a different way. It’s like turning your dining table into the ultimate fall celebration!
Want more seasonal dessert pairing ideas and pumpkin recipe inspiration? I’m constantly experimenting with new fall flavor combinations and sharing traditional baking techniques over on my Pinterest – you’ll find tons of ways to create memorable holiday spreads that showcase the best of autumn!
Pro Tips I’ve Learned Along the Way
Crust perfection: Keep everything cold and work quickly to prevent tough pastry. Chill your assembled pies for 30 minutes before baking for the best shape retention.
Filling texture secrets: Don’t overbeat the filling – that incorporates too much air and causes cracks. Mix just until smooth and combined.
Doneness testing: Test with a knife near the center, not the exact middle where custard takes longest to set. A slight jiggle in the very center is actually perfect.
Temperature control: Use an oven thermometer to verify accurate temperatures. Pumpkin Pie is sensitive to heat variations that really affect the final texture.
Troubleshooting When Things Go Wrong
Cracked filling? Usually from overbaking or too high temperature. If cracks start appearing, reduce heat and tent with foil.
Soggy bottom crust? Pre-bake your crust for 5 minutes before adding filling, or use ceramic pie weights during the initial high-heat baking.
Curdled filling? This happens when you add hot milk too quickly to eggs. Always add gradually while whisking constantly to prevent temperature shock.
Weeping pie? This occurs when the pie is stored uncovered or at the wrong temperature. Keep it properly covered and maintain consistent refrigeration.
Perfect for Every Fall Occasion
This Pumpkin Pie is incredibly versatile for autumn celebrations. It’s the obvious choice for Thanksgiving, but it’s also perfect for Halloween parties, fall potlucks, or any time you want to bring some seasonal magic to the table.
The recipe makes two pies, which is perfect for large gatherings or when you want to freeze one for later. The traditional flavors appeal to all ages and dietary preferences (except those avoiding eggs and dairy).
Final Thoughts on This Amazing Pumpkin Pie
I’ve been making this Pumpkin Pie for several years now, and it never fails to impress. The combination of traditional techniques with that brown sugar secret creates something truly special that represents the best of American holiday baking.
This recipe delivers authentic flavors and textures that make Pumpkin Pie the holiday staple it’s meant to be. The detailed techniques ensure consistent results while the decorative options let you personalize it for special occasions.
This Pumpkin Pie has become my signature dessert for fall gatherings because it perfectly captures everything people love about this classic – that silky custard filling, perfectly spiced flavor profile, and beautiful presentation that makes it the centerpiece of any dessert table.
So next time you want to make a Pumpkin Pie that’ll have people talking long after the last bite, give this traditional recipe a try. Your kitchen will smell incredible, the results will look bakery-perfect, and you’ll have mastered the art of America’s favorite fall dessert.
Frequently Asked Questions
Can I use fresh pumpkin instead of canned?
Yes, but canned pumpkin provides more consistent moisture content and flavor. If using fresh, roast sugar pumpkins, puree smooth, and drain excess liquid before measuring.
Why does my pie crack during baking?
Cracking usually indicates overbaking or temperature too high. Reduce heat if cracks appear and check doneness with knife test rather than visual cues alone.
How do I prevent a soggy bottom crust?
Pre-bake crust 5-8 minutes at 450°F before adding filling. Use ceramic pie weights or dried beans to prevent puffing during this initial baking.
Can I make this pie dairy-free?
Replace evaporated milk with full-fat coconut milk and use dairy-free butter or vegan shortening in crust. Results maintain excellent flavor and texture.
How far ahead can I make pumpkin pie?
Bake pies up to 2 days ahead and refrigerate covered. Flavors actually improve overnight as spices meld together for more complex taste.
What’s the best way to slice clean pieces?
Use sharp knife dipped in warm water, wiping clean between cuts. Completely chilled pie slices more cleanly than room temperature versions.

