Let me tell you about the cookies that completely changed my autumn baking game: these Pumpkin Chocolate Chip Cookies that somehow manage to have crispy edges, chewy centers, and the most incredible nutty, spiced flavor that’ll make your entire house smell like a cozy fall dream.
I discovered this recipe during one of those weeks when I was desperately trying to nail the perfect fall cookie, and honestly, these Pumpkin Chocolate Chip Cookies are next-level stuff. They’re not your typical pumpkin cookies that taste like orange cardboard – we’re talking about cookies with brown butter magic and concentrated pumpkin that creates this perfect balance between warm spices and rich, melty chocolate.
The secret? A few pro techniques that sound fancy but are totally doable, like browning butter (which transforms everything) and concentrating the pumpkin puree so your cookies don’t turn into soggy messes. Trust me, once you try these, regular pumpkin cookies will seem like amateur hour.
Why These Pumpkin Chocolate Chip Cookies Are Pure Fall Magic
Here’s what makes these Pumpkin Chocolate Chip Cookies absolutely incredible – they’ve got this perfect harmony between warm autumn spices and rich chocolate, but with techniques that create bakery-quality results. The brown butter adds this nutty depth that makes every bite more complex and interesting.
The Real Deal Stats:
- Total time: 1 hour 30 minutes (includes chilling, but it’s worth every minute)
- Active time: 30 minutes of actual work
- Bake time: 9-13 minutes per batch
- Difficulty: Intermediate (but the techniques are easier than they sound)
- Yield: 15 generous cookies
What I absolutely love about these Pumpkin Chocolate Chip Cookies is how they mirror techniques you’d find in high-end bakeries. The extra steps aren’t just for show – they actually transform ordinary ingredients into something extraordinary.
Everything You Need for These Next-Level Cookies
Let me break down what goes into these beauties. This ingredient list is a bit more involved than your basic cookie recipe, but every single thing serves a purpose:
For the Cookie Base:
- 1 cup cold unsalted butter (European-style if you can get it)
- 2/3 cup pumpkin puree (Libby’s brand, room temperature)
- 1/2 cup granulated sugar
- 1/2 cup light brown sugar, packed firmly
- 2 large egg yolks, room temperature
- 2 teaspoons vanilla extract (go for the real stuff)
The Dry Squad:
- 1 2/3 cups + 1 tablespoon all-purpose flour
- 2 1/2 teaspoons pumpkin spice blend
- 1 teaspoon baking soda
- 1/2 teaspoon fine sea salt
The Chocolate Magic:
- 1 cup finely chopped chocolate (high-quality dark chocolate bar or premium chips)
Real Talk About Your Ingredients:
Brown butter situation: This is where the magic happens. European-style butter browns better because it has less water, but regular unsalted butter works fine too. Just watch it like a hawk during the browning process.
Pumpkin puree reality: You’re gonna concentrate this down to remove excess moisture, which is what prevents soggy cookies. Room temperature puree is way easier to work with than cold.
Chocolate choice: Chopped chocolate from a good bar melts better and tastes way better than chips. But if chips are what you’ve got, they’ll work – just try to get the good stuff.
How to Make These Incredible Pumpkin Chocolate Chip Cookies
Alright, let’s dive into the actual magic-making. Don’t let the multiple steps scare you – each one serves a purpose in creating cookie perfection.
Step 1: Get Your Setup Ready
Preheat your oven to 350°F and line two large baking sheets with parchment paper. Position your racks in the upper and lower thirds for optimal heat circulation.
Gather everything you need, including a 3-tablespoon cookie scoop if you have one. Trust me, uniform sizing makes all the difference in even baking.
Step 2: Master the Brown Butter Magic
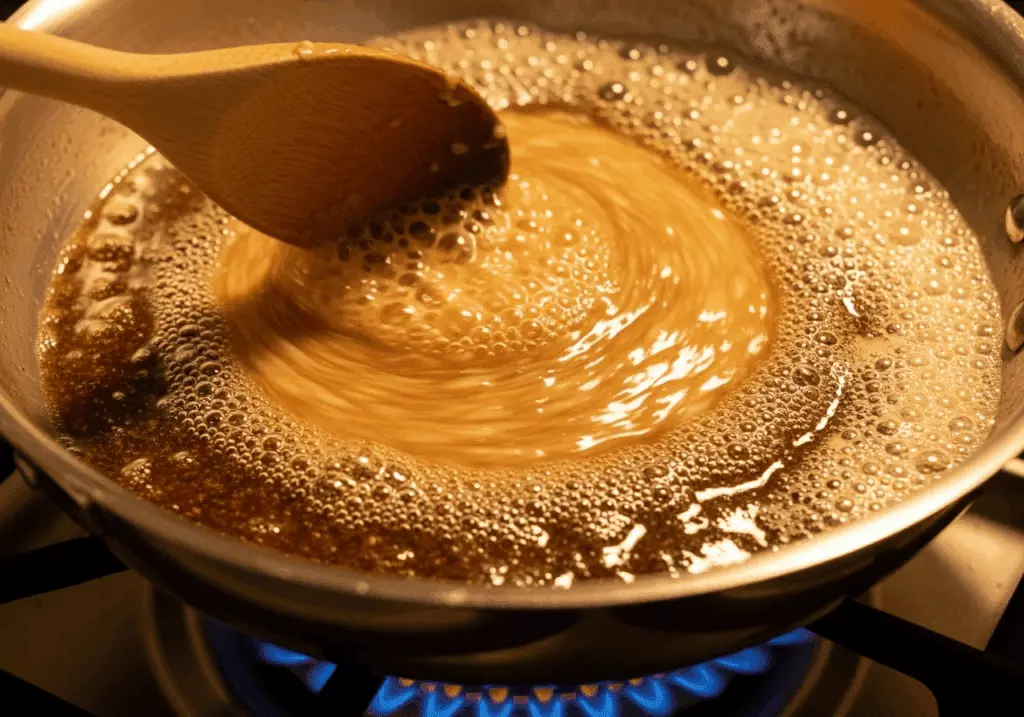
Here’s where things get exciting. Place your cold butter in a large stainless steel pan over medium heat. Stir occasionally as it melts, foams, and starts crackling. Keep cooking until you see golden-brown bits on the bottom and it smells absolutely incredible – like toasted nuts.

Remove it from heat immediately when you see that brown sediment and smell that nutty fragrance. You should have just under 1 cup of liquid gold.
Critical warning: Watch this like your life depends on it. Brown butter can turn into burnt butter in seconds, and burnt butter tastes bitter and terrible.
Step 3: Cool That Brown Butter Properly
Transfer your gorgeous browned butter to a glass measuring bowl and stick it in the fridge for 50-60 minutes, stirring every 10-15 minutes. You need it to reach 75°F – cool enough not to cook your eggs but still liquid.
This patience pays off, I promise. Use an instant-read thermometer if you have one for accuracy.
Step 4: The Pumpkin Concentration Game-Changer
While your butter cools, spread that room-temperature pumpkin puree on a large plate. Press stacks of paper towels into it to absorb excess moisture. Re-spread and repeat with fresh towels until the puree feels like soft playdough.
This step is crucial – it’s what prevents soggy cookies! You should end up with about 1/3 cup of concentrated pumpkin that holds its shape when scooped.
Step 5: Create the Perfect Sugar Base
Once your brown butter hits 75°F, whisk in both sugars for exactly one minute. Set a timer! The mixture should look like pale, wet sand with no sugar lumps.
This timing creates the perfect emulsion that contributes to ideal cookie texture. Don’t rush this part.
Step 6: Add the Wet Ingredients
Whisk in the egg yolks, vanilla, and your concentrated pumpkin puree until everything’s completely combined. The mixture should be smooth without any streaks.
Add ingredients one at a time, mixing thoroughly after each addition. Room-temperature ingredients make this so much easier.
Step 7: Fold in the Dry Stuff
Combine your flour, pumpkin spice, baking soda, and salt in a separate bowl. Fold the dry ingredients into the wet mixture using a rubber spatula until just combined. Add the chopped chocolate and fold gently.
Stop mixing as soon as the flour disappears – overmixing creates tough cookies, and nobody wants that.
Step 8: Shape and Bake to Perfection
Using your cookie scoop (or a spoon), portion the dough onto your prepared baking sheets, spacing them 2-3 inches apart. Roll each portion between your palms to create uniform spheres.
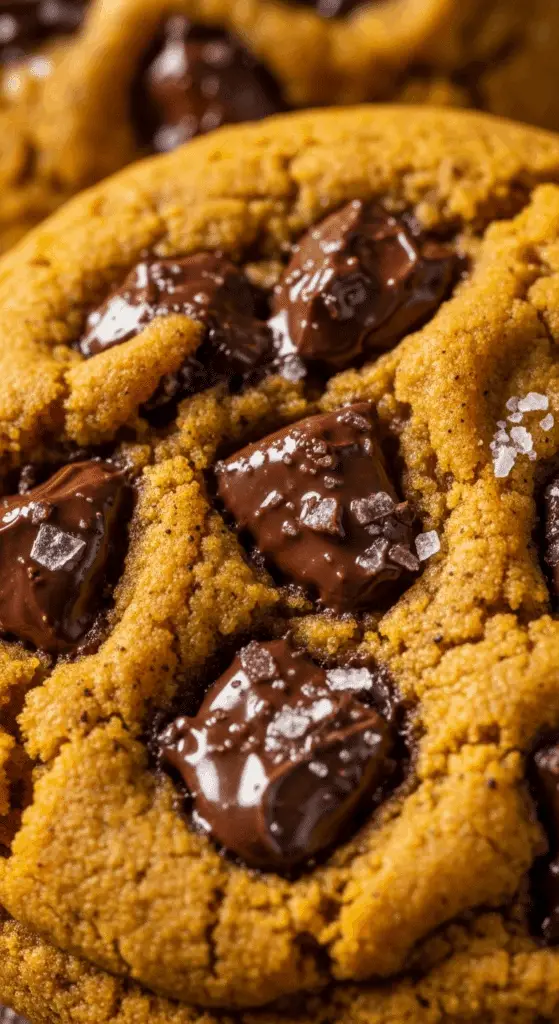
For extra chocolate appeal, press additional chocolate pieces on top before baking. This creates beautiful melted chocolate pools on the finished cookies.
Step 9: The Perfect Bake
Bake one tray at a time for 9-13 minutes until the edges are golden brown but the centers still look slightly underbaked. They’ll continue cooking on the hot pan after removal.
Here’s a pro trick: immediately after baking, use a large round cookie cutter to gently push the edges inward, creating perfectly round, thick cookies.

Making Your Pumpkin Chocolate Chip Cookies Look Bakery-Perfect
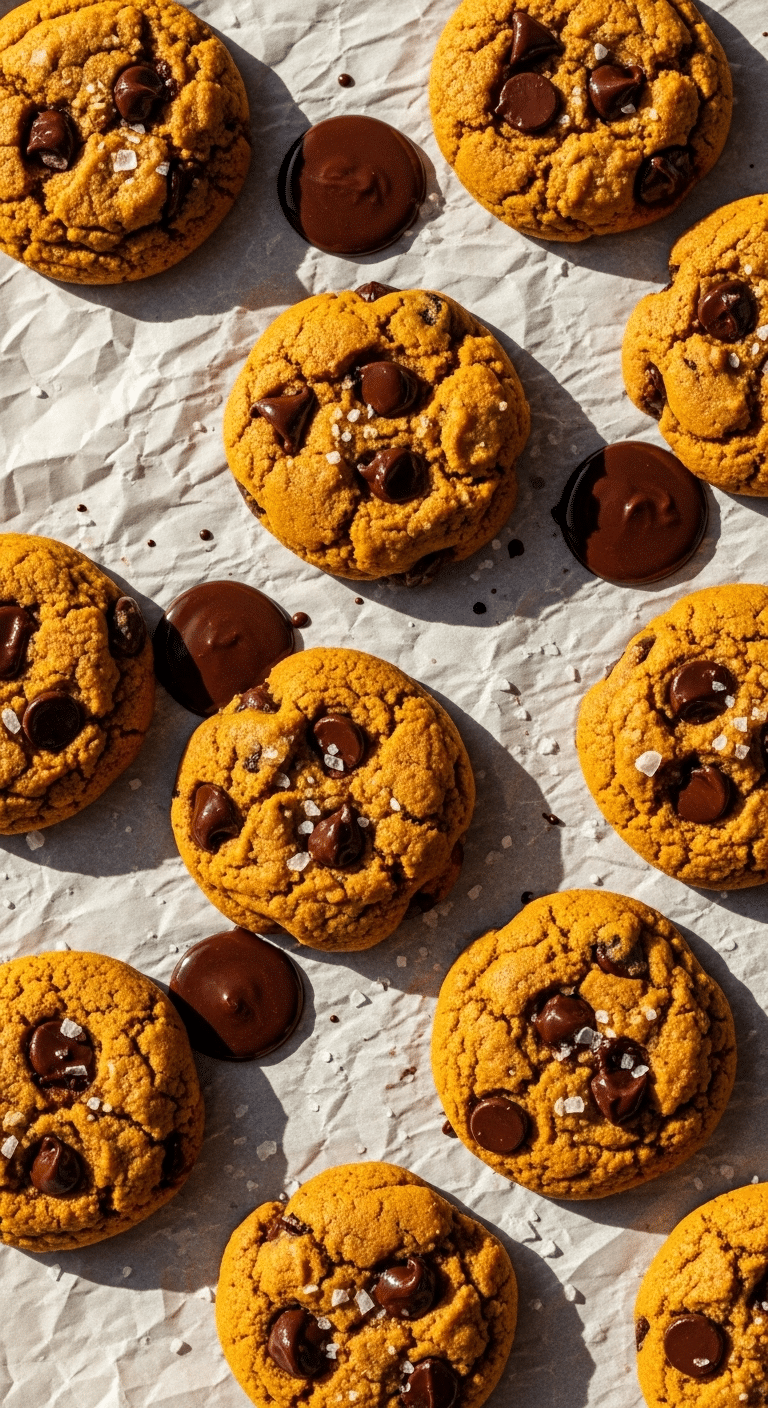
Let those cookies cool completely on the baking sheets before transferring them. This prevents breaking and allows proper texture development. The contrast between the golden cookie base and dark chocolate creates this stunning presentation that looks totally professional.
Serve them with cold milk, hot coffee, or warm apple cider. If you want to get fancy, pair them with vanilla ice cream for an elevated dessert experience. A light dusting of sea salt on top enhances both the appearance and flavor.
PrintPumpkin Chocolate Chip Cookies That’ll Ruin You for All Other Fall Treats
These Pumpkin Chocolate Chip Cookies are soft, chewy, and full of warm pumpkin spice flavors with pockets of melty chocolate. Perfect for fall baking, they combine browned butter and pumpkin puree for a rich, cozy treat.
Ingredients
- 1 cup cold unsalted butter
- 2/3 cup Libby’s Pumpkin Puree, room temperature
- 1/2 cup granulated sugar
- 1/2 cup light brown sugar, packed
- 2 large egg yolks, room temperature
- 2 teaspoons vanilla extract
- 1 2/3 cup + 1 tablespoon all-purpose flour
- 2 1/2 teaspoons pumpkin spice
- 1 teaspoon baking soda
- 1/2 teaspoon fine sea salt
- 1 cup finely chopped chocolate bar or chocolate chips
Instructions
- Preheat oven to 350°F (180°C). Line two baking trays with parchment paper.
- Brown the butter in a stainless steel pan, stirring until nutty and golden with brown bits. Scrape into a bowl and refrigerate for 50–60 minutes, stirring occasionally, until it cools to 75°F but is still liquid.
- Spread pumpkin puree on a plate and press with paper towels to absorb excess moisture until dry and reduced to about 1/3 cup (75 g).
- Whisk cooled browned butter with granulated sugar and brown sugar for 1 minute until sandy.
- Whisk in egg yolks, vanilla extract, and dried pumpkin puree until combined.
- Fold in flour, pumpkin spice, baking soda, salt, and chocolate chips until just combined.
- Scoop dough into 3-tablespoon balls, roll, and place 2–3 inches apart on trays. Optionally press extra chocolate chunks on top.
- Bake one tray at a time for 9–13 minutes, until edges are golden but centers slightly underbaked. Immediately use a round cutter to scoot cookies into a neat circle if desired.
- Cool on a wire rack before serving.
- Store in an airtight container at room temperature for 2–3 days or freeze dough balls for later baking.
Notes
- Measure flour accurately to prevent dry cookies.
- Drying the pumpkin puree is essential for the right texture.
- For larger chocolate pools, chop chocolate into bigger chunks.
- Dough balls can be frozen and baked later, just allow extra time to reach room temperature.
Storage and Make-Ahead Magic
These Pumpkin Chocolate Chip Cookies stay fresh in airtight containers for 2-3 days at room temperature. Layer them with parchment to prevent sticking.
Make-ahead strategy: You can make cookie dough balls and refrigerate them for up to 3 days or freeze for up to 3 months. Just bring frozen dough to room temperature for 1-2 hours before baking.
Freshness trick: Add a slice of bread to your storage container to maintain soft texture. Replace the bread slice every few days for optimal results.
Fun Variations to Keep Things Interesting
Once you’ve mastered these basic Pumpkin Chocolate Chip Cookies, it’s time to get creative:
White Chocolate Cranberry Version: Replace the dark chocolate with white chocolate chips and add dried cranberries. The tart cranberries balance the sweet white chocolate perfectly.
Maple Pecan Twist: Substitute maple extract for vanilla and add chopped toasted pecans with the chocolate. Drizzle cooled cookies with maple glaze for extra indulgence.
Spiced Chocolate Variation: Use Mexican chocolate or add a pinch of cayenne pepper to your chocolate. The subtle heat complements pumpkin spices beautifully.
Cream Cheese Stuffed Version: Make cream cheese filling and sandwich it between two cookies. Roll the edges in mini chocolate chips for a professional bakery look.
The Health Perks (Because We Care About That Stuff)
These Pumpkin Chocolate Chip Cookies aren’t just delicious – they’ve got some surprising nutritional benefits too! The concentrated pumpkin delivers exceptional beta-carotene content, supporting immune function and eye health throughout flu season.
The pumpkin pie spice blend provides antioxidants and anti-inflammatory compounds, and cinnamon may help regulate blood sugar levels naturally. The brown butter and egg yolks provide healthy fats that support nutrient absorption, and dark chocolate contains compounds that may boost mood and cognitive function.
Perfect for those shorter autumn days when you need a little mood boost!
Perfect Fall Cookie Companions for Your Pumpkin Chocolate Chip Cookies
Now that you’ve mastered these incredible Pumpkin Chocolate Chip Cookies, let’s talk about creating the ultimate autumn cookie spread! These cookies work beautifully as part of a bigger fall baking lineup.
If you want to keep the spiced theme going but switch up the format, my spiced apple fritter bread pairs amazingly with these cookies. The apple and pumpkin flavors create this beautiful autumn duo, and having both cookies and bread gives people options for their fall treat preferences.
For those who love the soft, tender cookie texture of these Pumpkin Chocolate Chip Cookies, you absolutely have to try my carrot cake cookies. They have a similar chewy center and slightly crispy edge, but with completely different warm spice profiles that complement each other perfectly on a fall dessert table.
And here’s where I get really excited about pumpkin cookie variations – if you want to do a whole pumpkin cookie theme, add some pumpkin cookies with cinnamon frosting and maple pumpkin cookies to the mix! Having multiple pumpkin cookie styles gives everyone different flavor combinations to choose from, and the variety looks absolutely stunning when you arrange them all together.
The frosted ones provide that bakery-style presentation, while the maple version adds this cozy, warming flavor that’s different from the chocolate chip version but equally addictive.
Want more seasonal baking inspiration and creative cookie combination ideas? I’m constantly experimenting with new fall flavors and sharing advanced baking techniques over on my Pinterest – you’ll find tons of ways to elevate your autumn baking game!
The Science Behind the Magic
Understanding why these techniques work makes you a better baker. Brown butter creates complex flavors through Maillard reactions that you can’t get with regular butter. Concentrating the pumpkin removes excess moisture that would create steam during baking, leading to cake-like texture instead of proper cookies.
The temperature control is crucial – proper butter temperature ensures ideal cookie spread and texture. Too warm creates flat cookies, too cool prevents proper creaming. The combination of granulated and brown sugars creates optimal texture with crispy edges and chewy centers.
Troubleshooting When Things Go Wrong
Flat, spreading cookies? Your brown butter was too warm, or the pumpkin wasn’t concentrated enough. Chill the dough for 30 minutes before baking the next batch.
Dry, crumbly texture? You probably overbaked them or used too much flour. Check your oven temperature accuracy and measure flour using the spoon-and-level method.
Uneven browning? Oven hot spots or wrong rack position. Rotate pans halfway through baking and use the center rack.
Pale cookies? Your oven temperature might be too low, or you’re underbaking. Increase temperature by 25°F or bake 1-2 minutes longer until edges are golden.
Seasonal Baking Tips for Success
High humidity affects flour absorption, so add 1-2 tablespoons extra flour on humid days. Check your pumpkin spice blend’s expiration date – old spices create flat flavors.
For gift-giving, package these Pumpkin Chocolate Chip Cookies in clear bags tied with orange and brown ribbons. Include recipe cards for thoughtful homemade presents that people will actually treasure.
Final Thoughts on These Amazing Pumpkin Chocolate Chip Cookies
I’ve been making these Pumpkin Chocolate Chip Cookies for several fall seasons now, and they never fail to impress. The brown butter method and pumpkin concentration create cookies that honestly rival any high-end bakery.
Don’t be intimidated by the multiple steps – each technique serves a specific purpose in creating exceptional results. The time you invest in proper preparation pays dividends in flavor and texture that’ll make everyone who tries these cookies remember them.
These Pumpkin Chocolate Chip Cookies have become my signature fall treat, and I love how the techniques make me feel like a real pastry chef even though I’m just a home baker who got obsessed with perfecting cookies.
So next time you want to make fall cookies that’ll actually wow people, give this elevated recipe a try. Your kitchen will smell incredible, your technique will improve, and you’ll have cookies that taste like they came from the fanciest bakery in town./isolated-segment.html
Frequently Asked Questions
Why do you need to brown the butter for Pumpkin Chocolate Chip Cookies?
Browning butter creates complex nutty flavors through the Maillard reaction that regular melted butter cannot achieve. This technique adds depth and richness that elevates the cookies from good to exceptional, creating bakery-quality results at home.
Can I skip the pumpkin puree concentration step?
The concentration step is crucial for preventing soggy cookies. Excess moisture in regular pumpkin puree creates steam during baking, resulting in cake-like texture instead of proper cookie consistency. This step ensures optimal texture and flavor concentration.
What’s the best way to measure flour for these cookies?
Use the spoon-and-level method: spoon flour into measuring cup, then level with knife. Don’t scoop directly from bag, which packs flour and creates heavy, dense cookies. Proper measurement ensures the correct dough consistency and texture.
How do I know when the brown butter is ready?
Brown butter is ready when you see golden-brown sediment at the bottom of the pan and smell a distinct nutty aroma. The butter should foam, crackle, and pop during cooking. Watch carefully as it can quickly go from perfectly browned to burnt.
Why are my cookies spreading too much during baking?
Excessive spreading usually means the brown butter was too warm when mixed, or the dough wasn’t chilled enough. The butter should be 75°F – cool but still liquid. Chill shaped dough balls for 15-30 minutes before baking for better shape retention.
Can I use regular chocolate chips instead of chopped chocolate?
Yes, but chopped chocolate from a quality bar creates better melted chocolate pools and superior flavor. If using chips, choose high-quality brands and consider pressing extra pieces on top before baking for enhanced chocolate experience.

